Here’s a comprehensive recipe combining common best practices from various sources, focusing on authenticity.
Key Principles for Authentic Cannoli:
- Drained Ricotta: This is paramount! Soggy ricotta will lead to soggy shells. Drain it for at least several hours, preferably overnight, in the refrigerator.
- Thin Shells: The dough needs to be rolled very thinly to achieve that classic crisp, blistered texture.
- Marsala Wine: This is a traditional ingredient in the dough and contributes to the flavor and crispness.
- Frying Temperature: Maintaining the correct oil temperature is crucial for evenly cooked, golden shells that aren’t greasy.
- Fill Just Before Serving: To keep the shells crisp, always fill them right before you’re ready to eat.
Authentic Homemade Cannoli Recipe
Yields: Approximately 20-25 cannoli Prep time: 1 hour 30 minutes (plus overnight ricotta draining and dough resting) Cook time: 15-20 minutes
Equipment You’ll Need:
- Cannoli tubes/forms (essential!)
- Deep pot or Dutch oven for frying
- Meat thermometer or candy thermometer for oil
- Rolling pin (or pasta machine for easier rolling)
- Round cookie cutter (3-4 inch diameter)
- Pastry bag with a large round tip (or a sturdy Ziploc bag with a corner snipped)
- Cheesecloth or fine-mesh strainer
- Mixing bowls
- Electric mixer (handheld or stand mixer)
- Whisk
- Tongs
- Paper towels
Ingredients:
For the Cannoli Shells:
- 2 cups (240g) all-purpose flour (some recipes suggest 00 flour)
- 1 tablespoon (12g) granulated sugar
- 1/2 teaspoon salt
- 1 teaspoon unsweetened cocoa powder (optional, but adds depth and color)
- 2 tablespoons (28g) unsalted butter, cold and cut into small pieces (or traditional lard)
- 1 large egg yolk
- 1/2 cup (120ml) dry Marsala wine (or dry white wine like sherry, or even white grape juice for non-alcoholic)
- 1 teaspoon white wine vinegar (optional, for extra crispness)
- 1 egg white, lightly beaten (for egg wash to seal shells)
- 1 quart (about 1 liter) canola or vegetable oil, for frying
For the Cannoli Filling:
- 2 cups (about 500g) whole milk ricotta cheese (HIGHLY recommend draining overnight!)
- 3/4 cup (90g) powdered sugar (confectioners’ sugar)
- 1 teaspoon vanilla extract
- 1/2 teaspoon ground cinnamon (optional, but traditional)
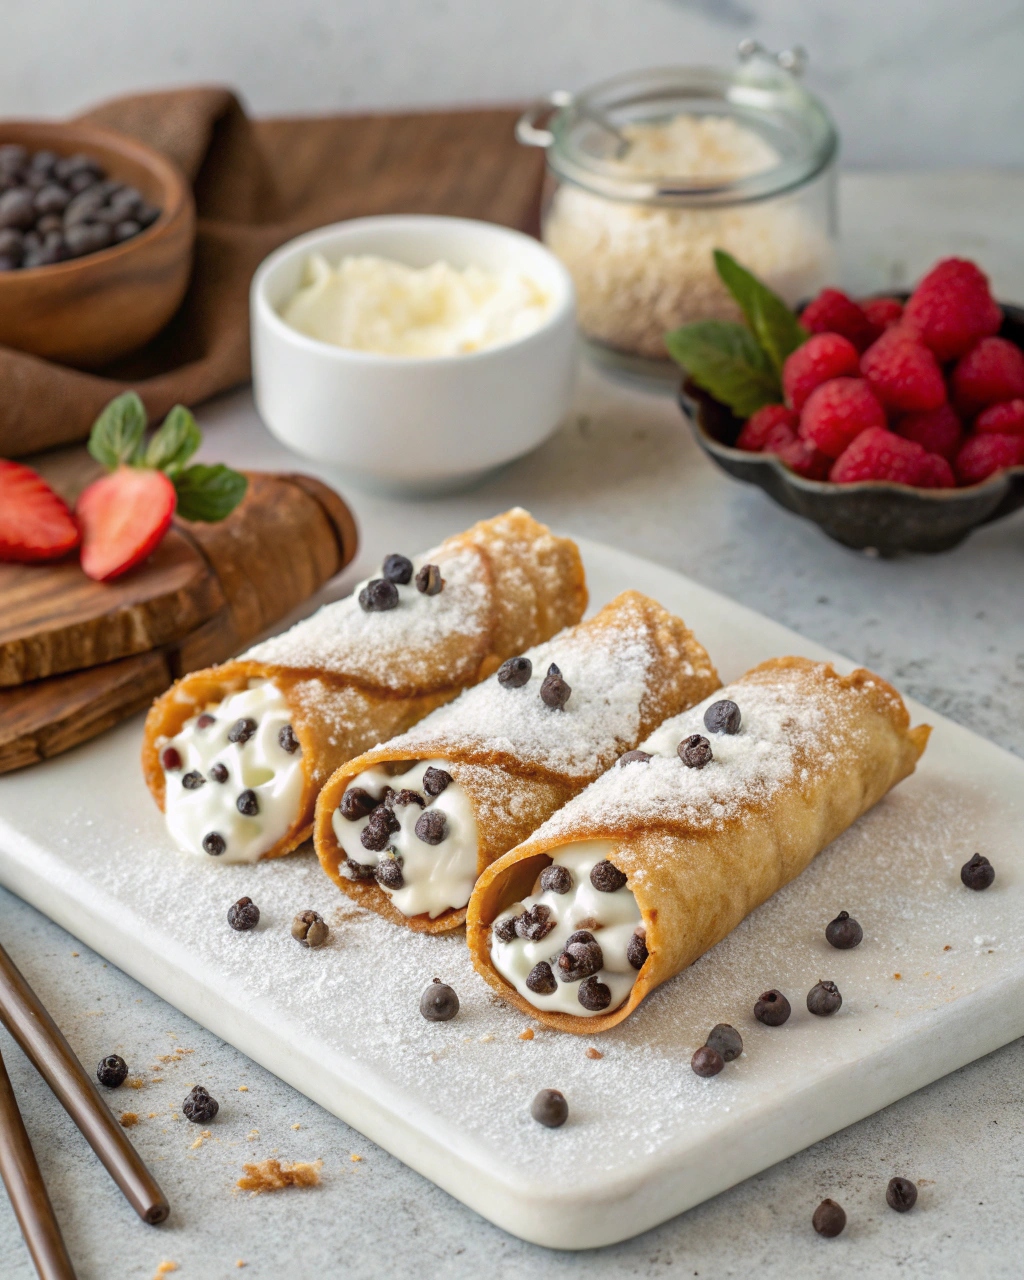
- 1/4 cup (about 40g) mini chocolate chips (optional, but popular)
- Optional: Candied orange peel, chopped pistachios, or a pinch of allspice
For Garnish (Optional):
- Powdered sugar for dusting
- Chopped pistachios
- Mini chocolate chips
- Candied cherries
Instructions:
Day 1: Drain the Ricotta (Essential!)
- Place a fine-mesh sieve or colander over a bowl. Line the sieve with several layers of cheesecloth.
- Spoon the ricotta cheese into the cheesecloth-lined sieve.
- Cover loosely with plastic wrap and refrigerate for at least 8 hours, or preferably overnight. You want as much liquid as possible to drain out, leaving a thick, firm ricotta. Some even place a light weight on top to help press out more liquid.
Day 1 or Day 2: Prepare the Shell Dough
- In a large bowl, whisk together the flour, granulated sugar, salt, and cocoa powder (if using).
- Cut in the cold butter (or lard) using your fingertips, a pastry blender, or a food processor, until the mixture resembles coarse sand with some pea-sized pieces of butter remaining.
- In a separate small bowl, whisk together the egg yolk, Marsala wine, and white wine vinegar (if using).
- Gradually add the liquid mixture to the flour mixture, mixing until a shaggy dough forms.
- Turn the dough out onto a lightly floured surface and knead for about 5-10 minutes, or until it’s smooth and elastic. It should be firm but pliable.
- Wrap the dough tightly in plastic wrap and refrigerate for at least 30 minutes, or up to 2 hours, to allow it to rest. This makes it easier to roll.
Day 2: Make the Filling
- Once the ricotta is well-drained, transfer it to a large mixing bowl.
- Using an electric mixer (or by hand with a whisk), beat the ricotta on medium speed until it’s smooth and creamy. Scrape down the sides of the bowl as needed.
- Sift in the powdered sugar, cinnamon, and vanilla extract. Mix on low speed until just combined, then increase to medium-high and whip for another 1-2 minutes until light and fluffy. Be careful not to overmix, as it can make the filling loose.
- Gently fold in the mini chocolate chips (and any other optional mix-ins like candied orange peel or allspice) with a rubber spatula.
- Cover the filling and refrigerate for at least 30 minutes to allow it to firm up.
Day 2: Roll and Fry the Shells
- Lightly flour your work surface and rolling pin.
- Take out a portion of the dough (keep the rest covered in the fridge). Roll the dough out very thinly, about 1/16 to 1/8 inch thick. The thinner the better for crispy shells! (If using a pasta machine, start at the widest setting and gradually go down to a thinner setting, usually the second to last or third to last).
- Using a 3-4 inch round cookie cutter, cut out circles of dough. Re-roll scraps once or twice, but don’t overwork the dough.
- Lightly grease your cannoli forms/tubes.
- Wrap one circle of dough around a cannoli tube, making sure it’s snug but not too tight (otherwise, it will be hard to remove after frying).
- Brush one edge of the dough circle with the lightly beaten egg white, then bring the other edge over to overlap and press firmly to seal the seam. Flare the edges slightly away from the mold to help the oil penetrate.
- Repeat with the remaining dough and tubes.
- In your deep pot or Dutch oven, heat the canola oil over medium-high heat to 350-375°F (175-190°C). Use a thermometer to monitor the temperature.
- Carefully lower 2-4 cannoli-wrapped tubes into the hot oil, being careful not to overcrowd the pot.
- Fry for 1-2 minutes, turning them occasionally, until they are golden brown and blistered.
- Using tongs, carefully remove the fried shells from the oil and place them on a paper towel-lined plate to drain.
- While still hot (but cool enough to handle with a kitchen towel), gently slide the cannoli shells off the metal tubes. Be careful, as the tubes will be very hot! Wipe the tubes clean and allow them to cool slightly before reusing.
- Continue frying the remaining shells in batches.
- Let the fried shells cool completely before filling. Cooled shells can be stored in an airtight container for a few days to a week.
Filling and Serving:
- Just before serving, transfer the chilled cannoli filling to a pastry bag fitted with a large round tip.
- Pipe the filling into each cooled cannoli shell from both ends, ensuring the entire shell is filled.
- If desired, dip the ends of the filled cannoli into chopped pistachios, mini chocolate chips, or candied fruit.
- Dust generously with powdered sugar.
- Serve immediately and enjoy your authentic homemade cannoli!
Tips for Success:
- Don’t skip draining the ricotta! This is the most common mistake that leads to soggy cannoli.
- Roll the dough thin. It’s essential for that classic crispy, bubbly texture.
- Control oil temperature. Too low, and the shells will be greasy; too high, and they’ll burn before cooking through.
- Fill just before serving. This is crucial for maintaining the crispness of the shell.
- Be patient. Making cannoli is a process, but the results are incredibly rewarding!